Premium Cabinets – Process Walk Through
Stanley called and set up a time to meet with me. We created a design on my computer of what he would need. Once his home was nearing completion we did a site measure and confirmed the measurements. Stanley’s kitchen had two main walls and a center island.
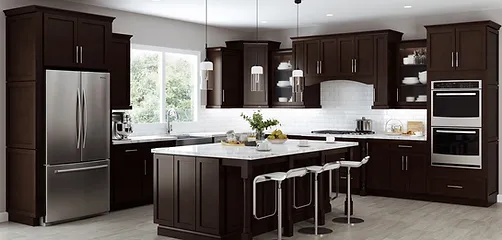
1 – Left side : The left wall holds the double ovens, microwave and an encased refrigerator.


2 – Right side: The right side has a centered sink base and a dishwasher to the right of it. The two uppers are symetrical – they are both 27 inches wide. You can see the three inch gap on the plan and then the three inch gap in the final picture.


3 – Center Island: The center island has a cooktop in the center and a small prep sink. The final cabinet has a functioning drawer. The large pony wall built for the island turned out extremely well.


We designed Stanley’s kitchen with Stanley’s input. We measured once the kitchen was ready to be measured. Stanley placed a down payment and ordered the cabinets. We delivered the cabinetry and Stanley’s homebuilder installed the cabinetry. The process was simple and straight forward. With basic measurements we can create a cad design, parts list and price you out to the penny in any of our styles.
Lane Mundine

